Inventory Wise
Quick Receive Inventory
The Quick Receive Inventory process provides the ability to quickly purchase new
parts for inventory. The Quick Receive Inventory process consists of three
processes. First you select the location and vendor for which you are purchasing
parts. Then you select the parts you wish to purchase. Finally,
you post the receipt to update the inventory. If the parts already exist in
the inventory the new parts will be added. The part cost will be calculated
on a weighted average cost basis.
The Quick Receipt Table is displayed below. The cursor is in the Criteria
Box at the top of the left toolbar. You can type in the transaction number
you are looking for in the CRITERIA box and press ENTER to display a list of return.
Or you can just press ENTER in the criteria box to display the first receipt.
Also, you can change the filter to OPEN to display only open receipts or you can
set the filter to CLOSED to display only closed receipts.
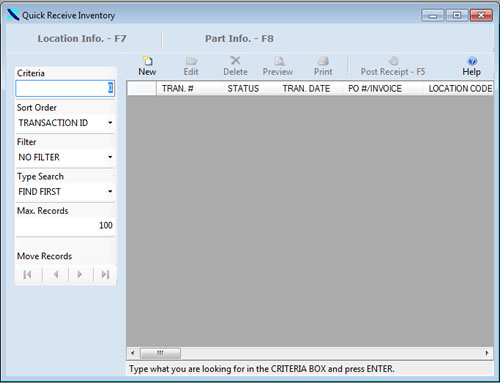
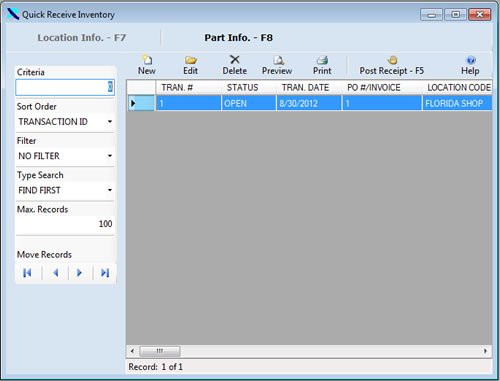
The existing Quick Receipts are displayed below. Click on the New Button to
create a new transaction or click on an existing transaction and then click on the
Edit Button to change it. You can also double click on a transaction to edit
it.
The Location Information is displayed in Edit Mode below.
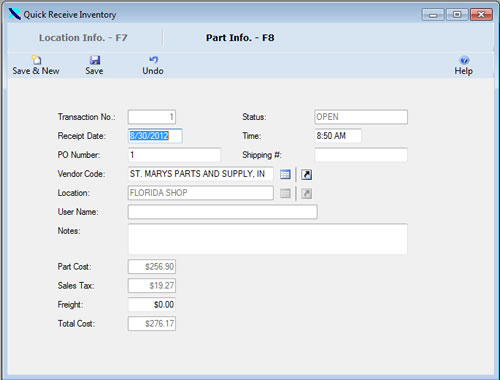
This window allows you to select the vendor and location for which you are purchasing
parts. Once you have saved the location, you cannot change it. You can
also enter the date and time of the receipt and any freight on the receipt.
The user name is automatically added by the system if security has been enabled.
The tax rate entered in the vendor code table will be used to calculate the sales
tax for each part.
You can then click on the F8 key or the Part Info. – F8 button to display the parts.
The window below shows one part that has been added to the receipt.
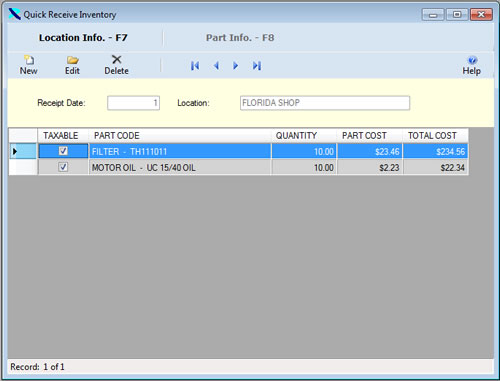
Click on the New Button to add a new part to the transaction or click on an existing
part and then click on the Edit Button to change it. You can also double click
on a part to edit it. The part information is displayed below in edit mode.
You select the part to purchase. Then you enter the quantity purchased and
the part cost for the part. This part cost will be averaged with any existing
parts to calculate the new part cost in inventory.
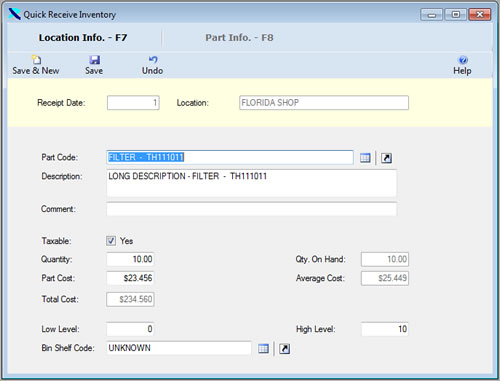
Once the changes are complete click on the Save & New Button to save the changes
and add a new record, or click on the Save Button to save your changes and returns
to the browse window, or click on the Undo Button to lose the changes.
Once all of the parts have been added to the receipt you can post the Quick Receipt.
Click on the F7 key or the Location Info – F7 button to return to the location window.
Then click on the F5 key or the Post Receipt button to post the receipt. The
window below will be displayed. Click on the Yes button to post the return.
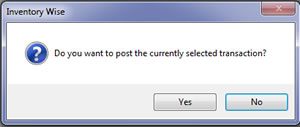
Once a receipt is posted it cannot be changed. Its status will be changed
to close. Posting the receipt updates the inventory.
Click on the links below to learn more about InventoryWise VB Inventory Management
Software.